Wednesday, July 13, 2011

Wood Signs Hand Painted To Look Vintage/Weathered

I love, love, love to paint signs! I think they are a great way to show off your personality. However, I'm not about to pay what stores want for a cute sign that I know is marked WAY up! About a year ago, I decided to start painting my own to display in my home. Yes, it takes time BUT if I can save a couple bucks, or in this instance, $40...I'm going to give it a go.

I started out painting just solid colored signs and stenciling on sayings and words. After awhile, this can get pretty boring so last week I decided to experiment and I have to say...I LOVE the results. Who knew that combining two completely different colors would look so cool!


So...here is how I did it for those of you DIY'ers out there!

I started out with just a plain board. I buy them in the 12 foot lengths and cut them to size. You can get a board at your hardware store for about $3.00. Luckily, my fiance has a longbox truck so I can load it up!

After I cut them to length, I sand them down. Sometimes you get some splintered edges and it can be a paint to try and paint and then sand afterwards. After sanding, I wipe the board down with a rag to get all of the sawdust off. Then...I pick my colors!

My favorite combination of colors is brick red and pool green. I do 2 coats of brick red as the undercoat. It looks best to do the darker color as the undercoat. For this how-to I used terra cotta for the undercoat and spanish olive for the top coat.


After the undercoat has dried, you're ready for the top coat. You do NOT need to apply this like you do the undercoat. The neat thing is, you don't have to cover the entire board. The thinner the coat, the less sanding you need to do. I like to leave some streaks on the edges of the boards. And each one looks different! Have fun with it.


After the top coat has dried, I stencil on my phrase or wording. I use my Cricut for this. Most people use the letters/shapes that they cut out for their projects but I use the negative and the center of the letters to stencil. I spray a light adhesive on the back side so that it sticks to the board and paint doesn't get between the stencil and the board but it also doesn't peel the paint off of the board.

After the stenciling has dried, I sanded the entire board down. I am really into the weathered look right now so I go to town with the hand sander! But it's entirely to your preference. After sanding the board, I wipe it down again with a rag. The last step is sealing the boards. Acrylic paint scuffs easily so I find sealing them takes this risk out of the equation. I use Minwax Clear Coat Satin Sealer in an aerosol can. It's the easiest to control when deciding how thick of a coat you would like.

Taa-Daa! A super cute and inexpensive sign. Made by you which makes it 100x better! Here are some that I've done in the day or so. Enjoy and Happy Wednesday!


Tuesday, July 5, 2011

A New Spin On A Corkboard!

I hope everyone enjoyed their Holiday weekend. I know the weather in Minnesota was sunny and well above average for heat and humidity. After spending most of the weekend outside and no end in sight for the hot weather, I figured today would be the perfect day to do some crafting in the basement. We have an air conditioner, but it's just a window unit so the top floor is very comfortable and the main floor is less than desirable.

On today's to-do list...a new corkboard! I'm so sick of the yuck brown corkboards. I especially wanted to make a new one for my kitchen which I've recently updated. I have a stack of open backed picture frames that I've been collecting from rummage sales and Goodwill. So, I decided to put a couple to work for me.


Here's what I needed for the project:
Open back picture frame
Foam poster board
Paint and Brush
Hobby Knife
Fabric
Hot glue gun
Picture hanger, Hammer and Nails

I started by cleaning, measuring and then painting the frame. Normally I would just use some craft paint but I wanted this frame to match the cabinets in my kitchen so I dug through all of my cans of paint until I found the leftovers (I should organize all of those paint cans one of these days). It only took 2 coats and dried faster than I thought it would. I have high expectations because craft paint dries so quickly!


While the frame was drying, I made the backing. Before I painted the frame, I took measurements of the inside portion from the backside of the frame. I took those measurements and drew it out on the foam posterboard. I then took my hobby knife, scored one side, bent the foam board on the score line and cut through the other side.


Before I worked with the fabric, I did a dry run with the foam board and frame to make sure the size was accurate. I didn't want to get all done and then have problems putting it together. My motto growing up was measure once, cut twice...shhhh...don't tell my carpenter father that!

Next, I measured out a piece of fabric so there was an extra inch on each side to wrap around. Before attaching it, I ironed out the wrinkles. I have piles of fabric that sit in a container so wrinkles are a staple.


Admist doing this, I put another coat on the frame and remembered to warm up the hot glue gun. It's a good day! After the glue gun was warm, I was ready to attach the fabric to the foam board. At the corners, I cut a diagonal line so that when I fold up each of the sides, I don't have excess fabric folded over causing a bulge.

You can use tape to attach the fabric but I'm a hot glue gun kind of gal. It took awhile, but I think I've mastered it. After each side is attached (I put a line of glue down the entire side to ensure it's attached), you're ready to attach the back to the frame.
Make sure your frame is dry first or you will have a gooey mess, trust me on this one. To attach the backing I put a large dallop of hot glue in each of the four corners and then insert the backing and hold. Viola!


I had to put a picture hanger on the back of this frame as I had taken the original one off, oops. It's no big deal and they are relatively cheap ($1.05 for a package of 12 with nails at Menards).

I liked the way this one turned out so much that I make another, larger cork board for my office. I painted the frame a dark brown but used the same fabric. I love how simple and functional they are.
 
Happy Tuesday!

Tuesday, June 21, 2011

No-Sew Napkins!

I'm not sure about any of you, but I don't mesh well with sewing machines. In fact, my last run in with one ended with me literally throwing it across the room into the closet door. True story.

So, when I decided that I wanted to MAKE, yes make, all of my napkins for my wedding in October, my skin was crawling at the idea of having to sew 250 napkins. I had originally purchased some polyester blend napkins but thought they were too plain. I've decided to buy 4 different prints in the same color palette to add some color to the white and burlap covered tables.

I haven't chosen the colors that I want yet, that's still a work in progress. Before I do that, I had to make sure that this was a do-able task. So far, so good!

Here's what you'll need:
~ Rotary Cutter (optional)
~ Cutting Grid (optional)
~ Pinking Shears with a decorative edge
~ Fabric

What I did was bought a few fat quarters from the local fabric store. This way, I could test this project out without having a ton of leftover fabric. Before starting, I washed, dried and ironed the fabric. So, I decided what size I wanted my napkins, roughly 17 inches square.


I used the rotary blade cutter to cut my fabric to size, leaving an extra 1/4" inch for the decorative edge. If you can cut in a straight line, by all means, skip this step! I however, cannot cut in a straight line to save my life. I tried doing this without the rotary cutter and grid but I ended up with trapezoid looking napkins, no bueno!

After trimming all of the sides to size, I used the pinking shears along the edges to give it a nice decorative edge and to keep the napkin from fraying! I found that it's easiest to fold the fabric in half so that you have the same cuts on each side but it's a personal preference.


Only 250 to go...I think I can handle this...maybe! ha-ha I hope everyone has a great day!

Thursday, June 9, 2011

A Little Shameless Etsy Promoting.... :)

Hello my blog followers (all 3 of you, myself not included) and welcome to anyone viewing for the first time. With the recent death of someone very near and dear to my fiance and myself, I haven't had the time to get my craft on like I would like.

In lieu of a craft post, I would like to offer you all a coupon code for my Etsy store. If you like what you see, please feel free to click on my link in the right hand column and see what I have for sale in my store, AliHCreations.

For a limited time I'm offering a 10% discount to all shoppers that follow me on Facebook or that follow my Blog. All you need to do is enter the code, 10PERCENTOFF during checkout for a new, updated total.

Thanks so much and I hope you all hug and kiss your loved ones. Cherish every moment you have because we truly don't know when it will be our last. xoxo

Thursday, June 2, 2011

Baby Shower Invites

If you're like me...you currently have at least 10 friends that are pregnant right now. They seem to go in spurts, it will be quiet for awhile and then out of nowhere, you'd swear everyone you know is expecting. It's so exciting but I can only imagine how overwhelmed they are all feeling.

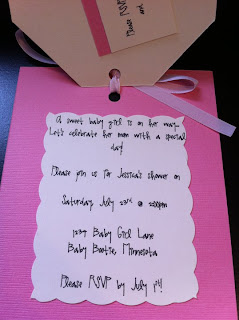
In the spirit of many of my girl friends expecting, I spent a few hours today crafting Baby Shower Invitations. I think they turned out super cute, although I will admit, I am a bit biased! For a tutorial, please see my previous days post. This is in addition to that post, just some more varieties to what I did with my Groom's Dinner Invitation. And now, they are all available on my Etsy Shop...AliHCreations.

Baby Boy Invitation


Baby Girl Invitation


Happy Thursday! It's almost the weekend!

Wednesday, June 1, 2011

Something Blue...Groom's Dinner Invites

I'm not afraid to admit that I am a bit of a procrastinator, ok a REALLY big one! I realized this morning while wiping down the dry erase board for the new month that we are a mere 4 months from the wedding. To be honest, October still seems like years away but if I've learned anything as  I grow older it's that time flies!

So, I've decided to tackle my groom's dinner invitations. I'm still waiting on the pocket folds from CardsandPockets.com to do my actual wedding invites so I will make do with what I have for now.

There are some things you should know about our wedding. Firstly, it will in no way, shape, or form be traditional. We are getting married at a ranch on the outskirts of the city limits. All of our guests will be brought to the ceremony site being held in the woods via horse drawn sleighs. Instead of chairs for the ceremony, there will be covered hay bales. Our dog, Dozer, is the ring bearer and I will be wearing my cowboy boots with my dress.

We are NOT doing the traditional 1 or 2 color options, instead we are using a pallet of autumn colors. Deep burnt oranges, mustardy yellows, Merlot reds and olive greens. Because of this choice, I have decided that the grooms dinner invites as well as the bachelor party invites need not follow a color scheme either. For them, I've chosen a mix between Kraft brown and cream and then also, oasis blue. I've completed a mock-up and extremely excited at how they turned out!

The hardest part was figuring out how to word the invitations because, in keeping with the non-traditional theme, my parents are hosting the grooms dinner, not his. After I tackled this mountain, the rest came pretty easily.


Originally, I wanted to do a different shape for the first layer but after some Internet searching and about 10 minutes cutting the shape one time with scissors, I passed and went for a simpler, "tag" look for the first layer. On the back side of the tag, I created a pocket for the RSVP information. In order for the guests to send it back as a post card it needs to be at least 3 1/2" x 5" so I chose to include the information that I would like from them as well as my email address on this insert. I wouldn't dream of having people RSVP for the actual wedding but I think I can get away with it since most people don't even send a formal invite for the grooms dinner.


I attached the event information to the oasis blue card stock cut to approx 3 1/2" x 5 1/2" and attached it all together with a matching ribbon. Simple, informational and in my opinion...adorable!


I hope everyone enjoyed their weekend, I know I did. Nothing like family time to help you remember what's truly important in life...quiet time alone (ha ha, I'm only kidding)!

Time to make more invites. I would love feedback on them as I'm trying to decide whether or not to make a template and load them into my Etsy store.

Thursday, May 26, 2011

Decorative Clothespin Magnets!

Happy Thursday! I hope everyone has a safe and fun Holiday weekend. Before I head to the cabin, I thought I would share my newest love, clothespin magnets. My fridge is absolutely covered in these because they are so easy and cheap to make, once you start, you won't be able to stop!

Materials: Mod Podge, Scrapbook Paper, Clothespin, Paint Brush, Magnets, Scissors and Epoxy.


The first thing you want to do is pick your favorite scrapbook paper that you'd like to turn into a magnet. For me, this was the most difficult part and partly why my fridge is completely covered in these...I couldn't decide which one I liked best. For this, I chose Sock Monkeys by Recollections.

I measured a clothespin and made a template so that I can trace the template onto the backside of the paper. I have a friend that ways to cut the paper until it's attached to the clothespin but I find you get a cleaner look when you cut before you attach it. I tried using a scissor but I notice that if you can't cut straight, you can definitely tell. So, I use my Cricut paper trimmer for straight lines.


After the paper is cut to size, I coat the top of each clothespin with a layer of Mod Podge and lay the piece of paper on the clothespin. I like to make sure I get a good seal, so I run my finger down the clothespin a couple of times.


While these are drying, I cut the magnets to size. I prefer the strip of magnets that you can buy at any hardware store. I like to make sure that the magnet is thinner than the width of the clothespin so it doesn't stick out.

After the first layer of Mod Podge has dried, I apply 2 more coats to ensure they are completely sealed. After they are completely dry, I attach the magnet strip that I cut in the previous step to the backside of the clothespin with either 2 part Epoxy or E600 permanent adhesive. I've found that these hold the best. I let the dry overnight to ensure they are attached properly.


After they are dry they are ready to be displayed! Enjoy! Here are some ones that I have displayed on my fridge. They hold up really well.

Tuesday, May 24, 2011

Chalkboard Coasters

Happy Tuesday! I hope everyone is enjoying fabulous weather like us, "Duluthians" are! The craft of the day...chalkboard coasters. They can also be used for name cards/place cards for weddings. These are great for bbq's, camping, cabin trips or just enjoying a drink on your deck! Never lose your drink again. These re-usable coasters are a life saver when you have multiple people drinking the same thing.

So, to start I took just a basic round wooden circle that comes in a package of 4 from Michaels. I lay them all out on a giant piece of cardboard in a well ventilated area.


Next, I prime them. This is important because the wood is extremely porous and will soak up a ton of chalkboard paint if you don't prime them first.


After the primer has dried, I spray them with the chalkboard paint. Make sure to shake the can really, really well! I typically do about 3 coats of chalkboard paint to make sure they are totally covered. You can do more or less but I tend to think more is a waste but to each their own.

The chalkboard paint dries fast so it's a pretty quick process. Afterwards, you have fabulous looking coasters that are sure to be a hit. I know mine have been!  If you're interested in purchasing these, please check out my Etsy Shop link in the right hand column. Thanks!

Monday, May 23, 2011

Backless Frame + Initials = Cute, Inexpensive Decor!

So, after having recently re-done my kitchen, I've decided that I need to add some decor on the bare, blue walls. In my before pictures, there is a green frame hanging on the wall with initials inside. Well, I took that and re-did it to match the new kitchen colors.

Here is a tutorial on what I did from start to finish. Total, this project cost me $1.50!

I took a backless frame that I bought at Goodwill for .99 cents and painted it to match the wainscoting, Sail Cloth is the color. In between coats, I Mod Podged the initials, K & A that I had on chipboard from Michaels. I had purchased them about a year or so ago for around .50. I used some shabby chic floral colors that would match the look I was going for. After the first coat of Mod Podge was dry, I did another coat on top of the scrap book paper to seal it.

Once the Mod Podge was completely dried, I took 2 burlap strips that were scrap from another project (see it pays to save scraps) and hot glued them to the back side of the initials. Once the paint on the frame was dry, I hot glued the top of the strips to the backside of the frame and Voila! A super cute, inexpensive piece of decor that is one of a kind!


Happy Monday!

Sunday, May 22, 2011

Wedding Inspiration ~ Tissue Paper Napkin Rings

With our wedding fast approaching (October 8, 2011), I have decided to kick my preparations into high gear. I am doing a lot of my own decor to save on money. I knew since the start that I wanted to splurge on cloth napkins. They really complete the look that I have in my mind. I will admit, I was a little hesitant about spending close to $200 on napkins but I had come to terms with it. One day, while on CraigsList, I found a woman that was selling the ones she purchased for her wedding that were still in the packaging! Turns out she didn't want Ivory napkins, so after a few emails, I was able to get 275 cloth napkins for $50 including shipping. That's roughly .18 cents a napkin! With a deal like that, I couldn't resist.

My original plan was to go with a colored napkin so now my task is finding a way to spruce up the ivory a bit. After some research, I found the perfect way to do this. I'm going to be making tissue paper pom napkin rings! They are very easy to make and I think they really look great!

Here's what you need:
~Tissue Paper
~Scissors
~Floral Wire (I used white, cloth wrapped floral wire from Michaels)


The first thing you're going to want to do is cut 4 pieces of tissue paper in approximately a 10"x5" rectangle. Then, stack the 4 pieces on top of eachother. They don't need to be cut perfectly or line up exactly, it will work out just fine if they are off a bit.


After you have your 4 pieces, you want to fold the paper, accordian style going the 10" way down the paper. I like my folds to be about 1/2 inch, it makes it easier when you're fluffing the flower. Fold the paper back and forth until your at the end.


Once you reach the end, fold the accordian in half, this is where you'll put the floral wire. I use about a 6" piece for the small poms, I fold it over the accordian and twist at the base to form a secure hold on the paper.


Once you've attached the floral wire, you want to trim the ends of the tissue paper. You can do a rounded edge, a square edge or even a pointed edge. Each type of end creates a different look for your flower. I prefer the rounded edge look. Try to cut of the same amount on each end so the sides of your flower aren't off.


After you've cut the ends, you fluff! There are different ways to do this but I like going one layer at a time starting at the top layer. I pull the layer up towards the center on one half. Then, I go to the next layer of that half and so on until all 4 layers are seperated. Then I go to the other half of the accordian and do the same. After all of the layers are seperated throughout you can tweak the fluffing. Sometimes the edges get folded over or bent, just tweak it to your liking.


It's that simple! In my case, I will repeat these steps about 250 times! When I put it into numbers like that, it's kind of scary. Ha-Ha. Have a great day! :)